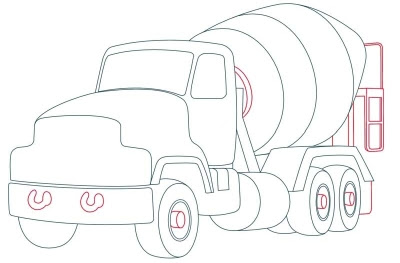
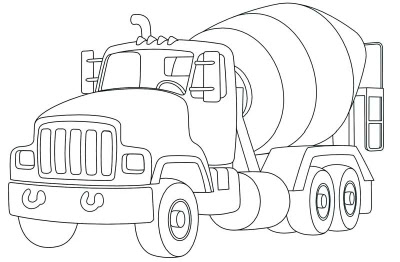
In this article, we'll show you how to draw the above cement truck. Either draw it freehand while looking at your computer monitor or print out this page to get a closer look at each step.
Follow the red lines in each illustration to learn exactly what to draw in that step. The lines drawn in previous steps are shown in gray. Here, we'll show you an illustration of each step and then give you a description of how to draw it.
Ready to get started? Check out the next page for the first step.
 1. Draw the Fender and Hood
 For the cement truck, start by drawing the shapes that make up the front fender, hood, and grille.
On the next page, we'll start drawing the cab.
 2. Begin Drawing the Cab
Draw a square with rounded corners behind the shape you just drew. This is the cab. Just below the grille, draw a slightly curved rectangle to make the front bumper.
Next, we'll add the windshield
 3. Add the Windshield and Tires.
Put windows in the cab. The front windshield is a curved rectangle, and the side window is a rounded, squarish shape. Draw one of the front wheels facing you, as shown; draw a half-circle on the other side of the truck for the other front wheel.
Next, we'll add the gas tank.
 4. Draw the Gas Tank
Draw a square shape below the cab; add a small rectangle at the top of this square. Draw a rounded shape with a circle at the front end for the gas tank. Draw the rear fender, outlining it to add depth.
Up next, we'll draw the rear wheels.
 5. Draw the Rear Wheels
Draw the rear tires (there are three rear tires visible from this angle). Draw the arm that holds the cement barrel in place. This piece starts behind the gas tank and goes up to behind the cab -- it is slightly bent where it touches the cab. Add a very small straight line right behind the door.
Next, we'll learn how to draw the cement barrel.
 6. Add the Cement Barrel
Draw the cement barrel, which looks a bit like the body of a bee. It is made up of three overlapping circles with a rounded triangle at the end.
Up next, we'll add a ladder to the rear of the vehicle.
 7. Add Hooks to the Bumper and a Ladder
Add details such as two U-shape hooks on the front bumper, oval wheel hubs, and part of a rectangle behind the rear wheels for a mud flap. To finish the cement barrel, draw two semicircles, one in front of the other, at the front of the cement barrel. Draw the ladder and platform at the back of the cement barrel. Study the picture, and use a ruler to make straight lines.
We'll add more detail to the cab on the next page.
 8. Add Detail to the Cab
Finish the details of the cab. Draw rectangular side mirrors, with two narrow rectangles attaching each mirror to the side of the cab. Draw four wedge-shape lights above the windshield, and sketch a candy-cane shape for the exhaust pipe coming out between two of the lights. Inside the cab, draw two semicircles, one just inside the other, for the top of the steering wheel. Draw the side and back windows, adding the line of the cement barrel.
Up next, we'll draw the grill and headlights.
 9. Add the Grill and Headlights
Draw and outline two squares for the headlights. Draw a large rectangle with five long rectangles inside it -- all have rounded corners -- on the grille. Add the small horizontal line behind the front tire.
We're almost done. We'll add the final touches next.
 10. Add the Final Touches
Use a felt-tip pen to trace over the lines you want to keep, and erase the extra pencil lines.


