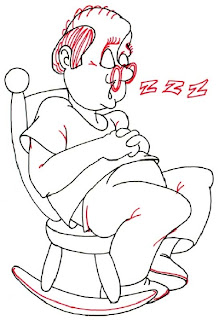
With a dash of creativity, a pinch of patience and a few easy steps, you have the perfect potion to help you learn how to draw a napping old man cartoon.
 In this section, we'll show you how to draw the above napping old man cartoon. You can draw this sleepy fellow freehand while looking at your computer monitor or print out this page to get a closer look at each step.
Follow the red lines in each illustration to learn exactly what to draw in that step. The lines drawn in previous steps are shown in gray. Here, we'll show you an illustration of each step and then give you a description of how to draw it.
 Step 1: Draw an oval head and a potato-shaped body. Attach them with two short lines. Use an oval, J-shapes, and curved lines for the legs and feet.
 Step 2: Form the arms, hands, and shoulders with odd U-shapes. Sketch a circle, straight line, curved line, and banana-shaped, U-shaped, and J-shaped figures for the rocking chair. Use a curved line for the bottom of the pants leg.
Outline an upside-down, thick U-shape for the hair. For the forehead and nose, place a U-shape next to a larger U-shape that has a long curved line attached. Place an upside-down comma-shaped figure under the nose for the mouth. Attach the U-shaped chin to the nose with a curved line.
 Step 3: Use U-shapes and curved lines to form the forehead, brow, and eyelids. Place attached U-shapes in the ear. Connect U-shapes and curved lines to add fingers.
Outline the clothing with J-shapes (some backward) and curved lines. Form the top of the seat with a J-shape lying on its side. Detail the shoes with curved V-shapes and curved lines.
 Step 4: Attach short curved lines for the eyebrows. Use two curved lines and a V-shape for wrinkles in the eyelids and face. Draw many curved lines for the hair. Use an oval, partial ovals, and curved lines for the glasses.
Sketch odd Y-shapes and short curved lines for folds in the clothing. Detail the arm with a short curved line and Y-shape. Add soles to the shoes with two curved lines.
Add a long curved line for an edge on the rocking chair base. Show the snoring with three Z-shaped outlines.
 Step 5: Darken the Z-shapes, glasses, mouth, and inner edges of the clothing. Add shadow lines to the rocking chair, sole of the right shoe, and the leg on your right.
No comments:
Post a Comment